Same dough a minute or so later, using dough hook instead of rolling pin & spatula.
Promotions Flexsteel Sofas Spyderco Blade Buy Now Casio Px 130 Review
Promotions Flexsteel Sofas Spyderco Blade Buy Now Casio Px 130 Review
 | Price : $76.65
Converting 220 To 110 Reviews Uniden Homepatrol Scanner Guide Summit Racing Discounts On Sale
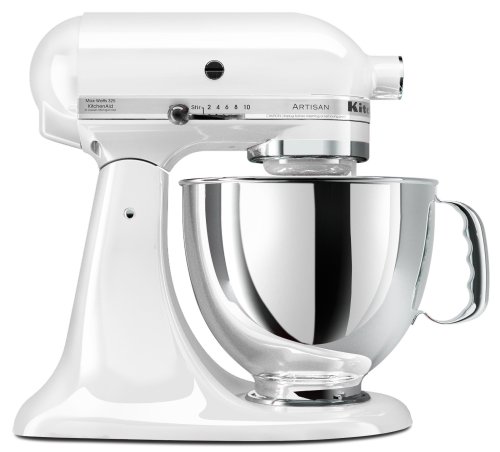
KITCHENAID ARTISAN STAND MIXER *325 watts, 10 speeds *5 qt. bowl with handle *Includes pouring shield, wire whip, flat beater and dough hook *Tilt head platform *Boxed *White
Discounted Power Block Adjustable Dumbbells Cheep Conair Heating Pad
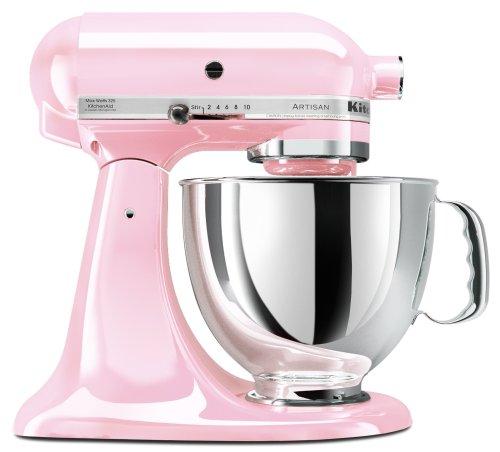
In support of a cure for breast cancer, pink is a wonderful color for the celebrity appliance in your kitchen! When you purchase this great appliance, KitchenAid will donate fifty dollars to The Susan G. Komen Breast Cancer Foundation. Cook for the Cure! More is more sometimes, at least in the world of small appliances. and such is the case with the KitchenAid Artisan mixer. It has a tilting head, like the KSM90, but it has a larger 5 qt. capacity bowl. It also gives you more oomph, as in 325 watts of cookie dough busting power. What's not to love? If you've been considering a stand mixer, this may be the perfect "starter model" for you.
Just as the name implies, artisan bread is crafted by hand in small, specialized batches. Artisan bakers provide special attention to the ingredients, equipment and processes used in baking their own type of bread, often compared to master sculptors albeit they work with flour and water instead of marble and clay. Then, contrast artisan bread with its commercial counterparts in supermarkets and bakeries. The latter are often filled with preservatives and additives and manufactured in assembly line style, thus, taking away the joy of eating into bread with its savory flavors intact.
And lest you think that baking artisan bread is difficult since it appears to require advanced skills, think again. You can apply the following tips to start baking your own artisan bread to serve during special occasions.
Weighing
You must follow the recommended measurements when baking this bread. This is because it contains no preservatives and, hence, changes in the measurements can affect the shelf-life of the bread. As you gain experience, you may be able to tweak it to suit your tastes and add other ingredients like sun-dried tomatoes. Also, it is best to use the metric system in measuring the ingredients with the exception of small quantities of yeast and salt.
Kneading
You have to knead the dough after the basic ingredients of flour and water, yeast and salt have been combined but before it is made to rise. Kneading maximizes gluten formation that contributes to the texture of the artisan bread. You can use either your hands or a machine for this purpose, with the windowpane test as a common factor.
Pre-fermenting
You also have to allow the bread to ferment since it builds on the flavor of the artisan bread. Most artisan bakers will use a preferment for this purpose, which comes in names like biga, chef, levain and sponge. Quite simply, it is a mixture of flour, yeast and water that has been allowed to ferment on its own for several hours or days and then mixed into the final batter.
Shaping and Slashing
Any artisan bread is only worth its salt when it looks the way it is supposed to look. Thus, baguettes must be long and narrow with a crusty top, a boule must be round and crusty, and a Vienna loaf must be oblong and tapered at the ends. Of course, the bread's unique appearance is due to the shaping and slashing techniques used, which you can learn as you go along.
Baking
Now comes the moment of truth. You have to bake the kneaded, fermented, shaped and slashed dough in the oven with the right temperature at the right time. Keep in mind that each type of artisan bread has its own cooking time, thus, following baking instructions is a must to come up with excellent artisan breads.
Cooling
The final step in the process of making artisan bread is to cool it. Although it would be nice to be served piping hot bread, there are instances when cooling it on a wire rack is best. This allows excess water vapor to escape, thus, preventing a soggy bottom and the flavors to mature.
And now, you are ready to serve your artisan bread! You can serve it with coffee or tea or even juice depending on the flavors of the bread itself.
Miele Dust Bags Best Quality Electric Edger Trimmer Order Now Schwinn Exercise Bicycles Top Quality
 | Price : $199.00
Perfect for kitchens of all sizes, the classic series stand mixer delivers the power and durability to mix large batches. 8 cup flour power. Powerful 250-watt motor. Versatile 10 speed control. Durable, direct drive transmission. Multipurpose attachment hub w
Two of the best blenders on the market today are the Vita-Mix 5200 and the Healthmaster. Although the basic function of each blender is similar, there are some benefits and drawbacks for each model. To begin, lets evaluate the Healthmaster:
Pros:
Cheaper than the vita-mix blender 100 year warranty of the motor Stainless steel blades Lightweight (4lbs) Intuitive controls
Cons:
Overheats easily Lesser quality Inconsistent results Made in China
Next, we'll go over the pros and cons of the Vita-Mix 5200:
Pros:
Powerful Easy to Clean High speed 7 year warranty User friendly controls 64 ounce pitcher Made in the USA
Cons:
More expensive Bulky Noisy Tall
Once you upgrade all the bells and whistles for the Healthmaster, it makes the blender around 0. A customer could buy a Vita-Mix for a little bit more than that. Vita-mix has a longer warranty and lasts longer than any other blender. There have been families that pass their blenders down to their children. Most people who decide to purchase a vita-mix blender never regret their decision. It is a quality product. Most customers use their blender to make smoothies and drinks, but the vita-mix blender has a variety of uses. Which blender to buy depends on your unique wants and needs. If you are looking for a blender that will last years and years and still continue to deliver power and quality, the Vita-Mix blender is for you. If you want a cheaper blender that is only used occasionally, I think the Healthmaster will be sufficient for your needs.
Used Mission Tiffany Table Lamp Save Elliptical Trainer Consumer Reports Best Buy Perimeter Wifi Dog Fence
Now who doesn't love lemon meringue pie - yes many of us might of had some if we went to the diner - but that is not necessarily the real deal. If you want to know how to make a great lemon meringue pie that is quick, affordable and always works - this is the recipe for you! So what are we waiting for, let me get typing!
I have seen a lot of versions out there, but a recipe that doesn't use lemon zest to me is really not a real lemon meringue pie - the added zest and fresh lemon juice with a little pulp really makes this pie truly tart and sweet simultaneously and after making few of these great pies you will see there really is no effort at all to making fantastic great authentic lemon meringue pie just like your grandmother used to bake for special occasions.
I used to sell these at a restaurant I used to work in - I would go through 2 pies a night - we would never sell the pre-made stuff we bought from commercial bakeries no matter how hard we tried...this pie really is that good.
Ingredients:
1 baked pie shell cooled
3 large eggs separated (easier when done while eggs are still cold)
6 tablespoons cornstarch
1/2 teaspoon salt
2 cups water
2 tablespoons butter or margarine
4 teaspoons grated lemon rind
6 tablespoons fresh lemon juice with some pulp
1 cup white sugar for lemon filling
1 teaspoon pure lemon extract
***for meringue:
6 tablespoons of Super Fine white sugar for meringue
dash of salt for meringue
1/4 teaspoon of cream of tarter - to stabilize egg whites
1 teaspoon pure vanilla extract for meringue
Equipment Needed:
Double boiler, mix master such as kitchen aid or hand mixer, whisk\
Directions:
To double boiler add all of the following: cornstarch, salt, 1/2 cup of the white sugar, mix till combined then add water and stir. Cook over boiling water until thick stirring constantly. Then cover with lid and let cook for ten minutes. Combine egg yolks and rest of sugar into a bowl - stir till combined and add a little of the hot mixture to the egg yolks to temper them. Then add egg yolks to hot mixture and stir. Turn off heat yet stir mixture for 2 minutes. Remove double boiler from hot water, and place on trivet or counter where it is safe. While still hot, stir in butter, lemon rind, lemon juice and pure lemon extract. Let cool to room temperature - without stirring and NEVER cool in fridge! Keep lid off so that steam can escape. Once cooled, pour into baked pie shell and cover with meringue. Make sure all lemon filling mixture is completely covered with the meringue - and place on the middle rack of your oven about 15 minutes at 325 degrees or until the meringue is lightly browned. You can keep the pie in a cool dry spot away from prying eyes, hands and paws until you are ready to serve it up that night.
To Make Meringue:
Make sure your bowl, beaters are super clean void of any grease from previous uses. Add egg whites to bowl and start to beat.
Once eggs have started to be white and frothy, add sugar gradually. You might want to keep beating speed on medium or medium low so that your egg whites can dissolve the sugar. This is an imperative step that will help prevent your meringue from 'weeping' later on in the day as it sits for getting ready to be eaten.
For those of us that have kitchen aids - note, this process can be quicker than we realize being that these sort of mixers are super quick. So it is ok to beat slowly at first, so that the sugar has had the time to dissolve in the egg whites.
Continue beating until smooth and add vanilla extract.
To ensure all sugar has been dissolved, put a little on your fingers and rub them (as if you were making a snap) if you feel any bits of sugar, you will need to keep beating until smooth - so be careful not to over beat your meringue - which is why I suggested to beat at a medium speed.
Once meringue is shiny and peaks form, your ready to top your pie.
Now that you know how to make lemon meringue pie, be forewarned, you will wish you had made two pies instead of the just one. You can keep leftovers (should there be any) in the refrigerator. The real tricks are making sure the sugar has completely dissolved when making the mergingue as well as covering the filling completely with the meringue making to that you create a 'seal' with the meringue. Also it is very easy to cut the pie by using a knife you have rinsed under hot water. And let me know and tell me all about the oohs and ahs you receive when your friends and family taste your next perfect pie perfection!
Garden Tillers Quickly Water Backup Sump Pump Right Now Nestle Crunch Nutrition Buy Online
Dewalt Dw708 Quick Lowest Price Definitive Pro Cinema 800 Good Bargain Oxo Mandoline
Pancakes make a perfect breakfast, but making perfect pancakes can be tricky. There are a few easy tips to follow that will help one avoid the most common pitfalls and challenges that have stumped even the best chefs. Transform the perfect pancake from myth to plate with careful preparation, a little patience, and these simple steps.
As with any food, making the perfect pancake begins with high-quality ingredients. Baking powder should be refreshed every six months to ensure the leavening agents are working at an optimal level. Old baking powder can create droopy, heavy pancakes that refuse to rise. Flour and sugar should be no more than a year old to assure freshness, and milk and eggs should be used within a few days of purchase.
Mix the ingredients until the flour is moist, stopping before the batter is free of lumps. Over mixing can cause the batter to get runny, causing the finished product to more resemble crepes than pancakes. The lumps may be disconcerting to some, but they will disperse while cooking.
The burner or electric skillet heat should be set on medium for slow, even cooking. Many people think that turning the heat up to high is an acceptable way to decrease cooking time as long as they watch the food as it cooks, but this is absolutely not true. High heat is a sure way to evaporate or burn the oil used to grease the skillet or griddle. Make sure the surface is sufficiently heated before you pour the batter, otherwise the pancakes will cook unevenly or can stick to the pan. To make sure the right temperature is reached, sprinkle a drop of water on the surface. If it sizzles, it is ready.
Patience is a virtue, and one that is important in pancake making. Flipping the pancake too soon can cause it to under cook or, worse yet, fall apart. Wait until the upper side of the pancake is bubbly and then wait for those bubbles to burst before taking the spatula out. Remember, the perfect pancake is a work of art that cannot be rushed.
The final stage in making perfect pancakes is finding the right toppings. Skimping on cheap imitation syrups or using fruit that is past its prime can turn a beautiful breakfast into a nightmare. Try heating real maple syrup mixed with butter on the stove or in the microwave until the butter melts and the two are incorporated. Pour the heated syrup and butter over golden brown pancakes to turn breakfast into a dream come true.
Discounted Power Block Adjustable Dumbbells Led Undercounter Lights For Sale Electric Mattress Pad Buy Now
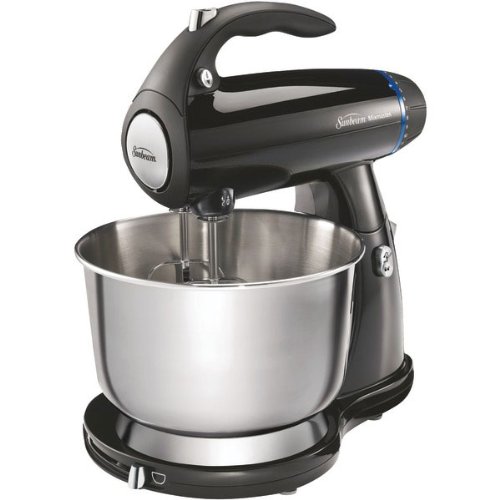
 | Price : $81.58 | Post Date : Nov 15, 2011 05:15:05
Sunbeam Mixmaster Stand Mixer features a powerful 350 watt motor with 12 variable speeds for unsurpassed mixing versatility. Soft start technology starts the motor slowly to prevent splatter. The ergonomically designed soft grip handle provides both maximum comfort and control. Off-center mixing allows you to add ingredients while you mix and requires less scraping saving you time. This mixer features 2 glass bowls, chrome beaters, whisks and dough hooks.
Promotional Cuisinart Dutch Oven Price Toro 20041 In Sink Erator Disposer Save You Money!
|
|
|
|
|
 |
 |
 |
 |
 |
 |
 |
 |